Don’t toss that cardboard toilet paper tube. Do-it-yourself entertainers know that tubes, wine corks and other types of trash are building blocks for great holiday crafts. So are fallen leaves, pine cones and leftover wrapping paper. Some projects are simple — cut a slit in wine corks, and use to hold place cards — and some require a bit more time. We’ve compiled a variety of our favorite crafts to make your holiday table special. These projects require little more than items from your utility drawer and recycling bin plus a quick trip to the crafts store. And most are so easy that little helpers can give a hand.
Sequin shimmer tree Materials: Sequins; pearl-head corsage pins or straight pins; foam cone Directions: Thread the sequins onto corsage pins and stick into the cone, covering it completely. Experiment with layering multiple sequins on one pin. Make it fun: Children will enjoy picking out sequins and creating different patterns to stick into the cone. Adapted from bhg.com
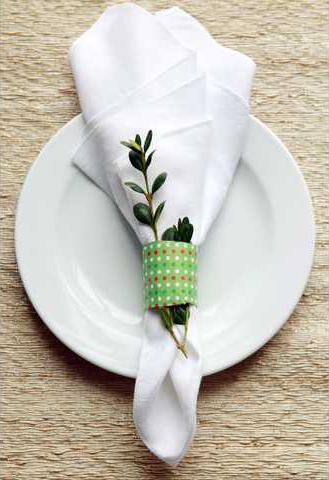
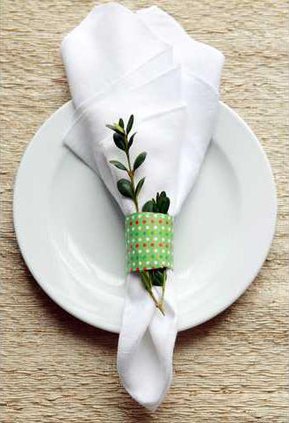
Recycled napkin rings Materials: Patterned craft paper; cardboard toilet-paper or paper-towel tubes; decoupage glue; sponge brush; scissors; embellishments (acorns, leaves, berries, etc.) Directions: 1. Measure and cut a piece of craft paper to fit around the cardboard tube, overlapping by ¼ inch. With a sponge brush, thoroughly apply decoupage glue to the outside of the tube and to the inside of the paper. Attach paper to tube, rolling it to smooth out any bubbles or bumps. Let dry for 15 minutes. 2. Apply another coat of decoupage glue to the craft paper. Let dry completely (30 minutes). 3. Cut the tube into 2-inch rings by pressing down on the tube until a pair of scissors is able to slice through it. Trim any excess paper. 4. Slip a napkin into each ring. Add pressed leaves or other embellishments. Make it fun: Children can pick out the paper and brush on the decoupage glue. Have children scour the yard for pretty leaves and berries to stick in the rings. Make sure to remind them not to eat the berries. Adapted from alphamom.com
Pine-cone place cards Materials: Card stock; fine-tip Sharpie; pine cones; wine glasses; ribbon (optional) Directions: Tuck a computer-printed or hand-written place card into each pine cone. Place a wine glass upside-down over the pine cone. If desired, tie a ribbon to the stem of each glass. Make it fun: Have children collect pine cones and write names on the card stock. Adapted from freshhomeideas.com
Stamped place card Materials: Small apple; sharp knife; paper towels; newspaper; poster or fabric paint; card stock; fine-tip Sharpie Directions: 1. Rinse, dry and slice apple in half. Blot with a paper towel to remove excess moisture. 2. Protect your workspace with newspaper. Dip apple half in paint, and use to stamp an apple design on the card stock. Write guest’s name on the card. Make it fun: Have children dip and stamp the apple. Adapted from homemadesimple.com
Snowglobes Materials: Hot-glue gun; plastic animals, Japanese puzzle erasers or other small figures; empty snow globes (available at Michaels stores); plastic pine tips or a small plastic tree; ultra-fine glitter; glycerin; warm water Directions: 1. Hot-glue one or two small plastic figures inside the lid of each jar. Hot-glue a small plastic tree or pine tip to add scenery. 2. Add 1 teaspoon of ultra-fine glitter and 1 teaspoon of glycerin to each jar. (Glycerine helps suspend the glitter in water.) Do not use extra glitter or it will clump. Fill jar almost to the top with warm water, stirring to combine. Screw the lid onto the jar as tightly as possible. 3. Gently shake the globe to be sure all the glycerin has mixed. Adapted from thecraftjunkieblog.com
Felt placemat and snowflake napkin ring Materials: ½ yard red felt and ½ yard white felt for each placemat plus ruler; chalk-marking pencil; scissors; white yarn; yarn needle; craft knife; cutting mat; pencil; hot-glue gun Directions: 1. For each placemat, measure, mark and cut 13-by-19-inch pieces of red and white felt. 2. Either print a star pattern (womansday.com/Articles/Home/Crafts/Holiday-Craft-How-to-Felt-Placemat-Napkin-Ring.html) or draw a festive holiday shape on a piece of paper. 3. Lay the paper on top of one piece of felt. Using a craft knife and cutting mat, cut out the design. 4. Place the felt with the cut-out pattern on top of the other piece of felt. 5. Using the yarn, stitch the two pieces of felt together. (If you wish, you can alternate colors as you make more placemats. You also can attach the cut-out stars to the placemats or napkin rings with a hot-glue gun.) Make it fun: Older children can measure, mark and cut the placemats and stitch them together. Adapted from womansday.com
Cookie gift sleeve Materials: CD envelopes, cookies Directions: Have children draw holiday pictures on the envelope. Insert a cookie. Give as party favors.
Infused vodka Materials: Vodka; flavorings (listed below); gift bottles; card stock; glue; sequins Directions: 1. Place 1 liter of vodka and the infusion ingredients in a large bottle and seal shut; let rest in a cool, dark place for 2 to 5 days, depending on the desired strength. 2. Strain into gift bottles. Print and adhere adhesive labels. Give as party favors. 3. Create a gift tag by cutting a holiday shape out of card stock. Decorate with sequins. Flavorings: Coffee: Use ½ cup crushed (not ground) coffee beans; shake every two days during infusion. Apple-vanilla: Use 2 whole, split vanilla beans plus 1 apple, peeled and sliced. Five-Chile: Use five dried chiles, chopped. Orange-Ginger: Use 1 orange, sliced, and ½ cup sliced fresh ginger. Make it fun: Clearly, children and vodka do not mix, but we couldn’t resist this festive party favor. Children can help by cutting the holiday shapes for the gift tags and gluing on sequins or coloring a festive design. Adapted from rachelraymag.com
Super easy craft projects can dress up holiday tables

